Wink
Wink
![]() Wink is a free software screen-capture program that allows you to make presentations and tutorials about using software programs. A Wink presenter can also add comments and verbal explanation throughout a Wink presentation. The recorded screen shots included in the 5 learning packages have been produced using Wink.
Wink is a free software screen-capture program that allows you to make presentations and tutorials about using software programs. A Wink presenter can also add comments and verbal explanation throughout a Wink presentation. The recorded screen shots included in the 5 learning packages have been produced using Wink.
Wink is a Tutorial and Presentation creation software, primarily aimed at creating tutorials on how to use software (like a tutor for MS-Word/Excel etc), but using Wink you can do many things, capture screenshots, add explanations boxes, buttons, titles etc and generate a highly effective tutorial for your users.
You can create interactive slides using your own powerpoints and visual presentations that can be then distributed inside on any learning package.
Using Wink you can create content viewable across the web in all these users' desktops realising the file in flash format (.swf) or in .exe (executable file).
Features

- Freeware: Distributed as freeware for business or personal use. However if you want to redistribute Wink, you need to get permission from the author.
- Cross-Platform: Available for all flavours of Windows and various versions of Linux (x86 only).
- Audio: Record voice as you create the tutorial for explaining better.
- Input formats: Capture screenshots from your PC, or use images in BMP/JPG/PNG/TIFF/GIF formats.
- Output formats: Macromedia Flash, Standalone EXE, PDF, PostScript, HTML or any of the above image formats. Use Flash/html for the web, EXE for distributing to PC users and PDF for printable manuals.
- Multilingual support: Works in English, French, German, Italian, Danish, Spanish, Serbian, Japanese, Brazilian Portuguese and Simplified/Traditional Chinese.
- Smart Capture Tools: Capture screenshots automatically as you use your PC, based on mouse and keyboard input (great time saver and generates professional captures).
- Performance/Quality: Creates highly compressed Flash presentations (few kbs to few hundreds of kbs, much smaller than competing commercial products) ideal for using on the web.
- Tools:
- Navigation green buttons (normally like this:
 ). To move to next/previous/random frames in the presentation, you can also use custom bitmaps for these buttons (full transparency/alpha channel support).
 - Callouts and shapes for displaying text explanations. The inbuilt Callout Editor is used to create custom shaped callouts as you want.
- Intuitive drag-n-drop editing of the frame, callout, cursor, navigation buttons and the title elements.
- Advanced features like templates, cursor editing, palettes, background images, control bars & preloaders for the flash output etc.
- Completely PC and Web ready with exports to PDF, HTML, SWF and EXE formats.
- Innovative compression techniques applied to reduce filesize of output Flash file. Generated flash file plays in Flash players from version 3 and above, giving you widest array of target audience.
- Uncompressed output to allow you import the output of Wink into other Flash editors.
- Navigation green buttons (normally like this:
Working with Wink
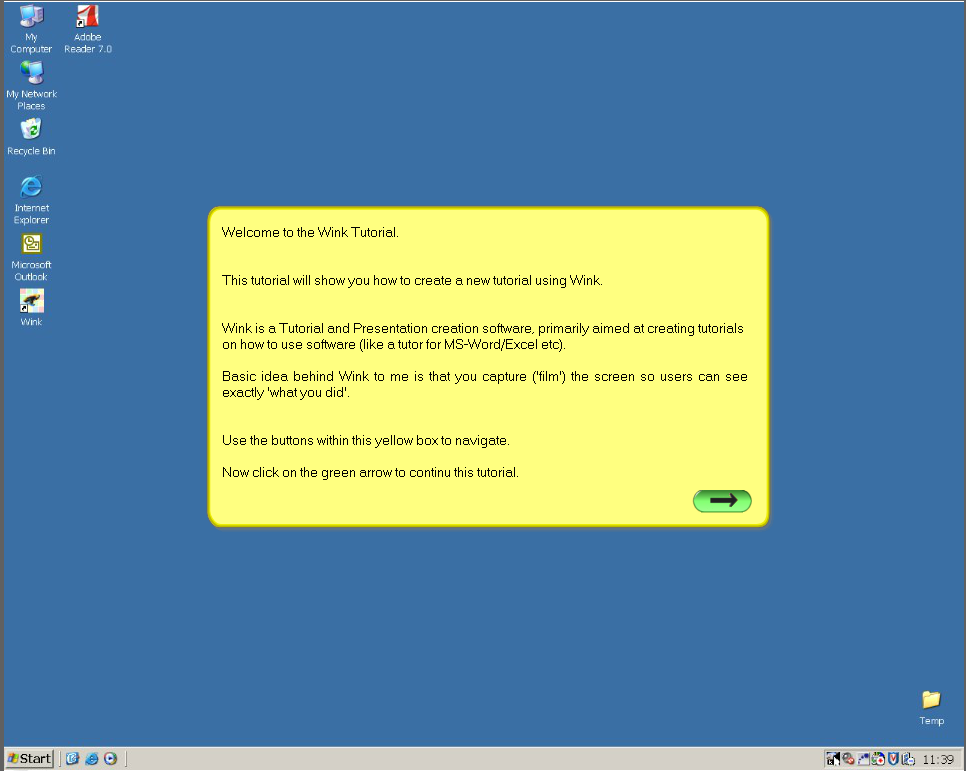
You might want to start by watching the short following Wink tutorial explaining how to create a Wink project. Click on it to watch:
The following instructions will explain how to produce a short video tutorial showing how to enter a simple calculation in an Excel spreadsheet.
- Open Wink. (Start > All Programs > DeBugMode or click on the Desktop shortcut for Wink.)
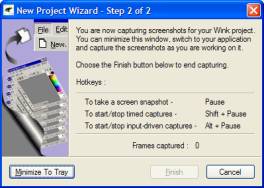
- Start a New Project. Go to File > New. A ‘New Project Wizard’ dialogue box opens. Use the Default settings within this Wizard.
 Confirm OK and Step 2 of the Project Wizard dialogue box opens. Note the HotKey instructions to take a screen shot and to stop/start the capture.
Alt + Pause is the best option so that every mouse click or keystroke is captured.- Click on Minimize to Tray.
- Open Excel. (File > All Programs > Excel) and start with a blank spreadsheet.
 Press Alt + Pause on the keyboard to start capturing the screen. Carry out the following procedure:
- Enter numbers in cells B3: B8
- Click onto cell B9.
- Click on to the Autosum icon on the Standard toolbar.
- Click on the green tick along the Formula toolbar to confirm the calculation.
- Move your mouse and click on cell B9 to indicate the total sum.
- Enter numbers in cells B3: B8
- Press Alt + Pause to stop the recording.
- Wink makes thumbnail images of each captured screen. Note the number of thumbnails at the bottom of the Wink screen.
To add text boxes, captions and arrows watch the Wink tutorials.
 To launch your Wink presentation as an animation, click on the Render icon on the toolbar. Alternatively, go toProject > Render. The time taken to carry out the rendering of the animation might be lengthy, depending on the number of slides, sound narration or captions.
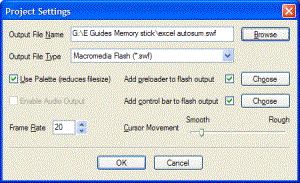
- Click on Project > Settings. Browse to find the E-Guide USB memory stick to save the animation. Leave other settings in place and confirm OK.
- Find the .swf animation file on your E-Guides USB memory stick and double-click to start the animation.
File Attachments
You have here the installation file included in this course package. If you own an Internet connection, you can go online and check if an updated version of the programme is available
Download latst versions from Internet
For Windows (version 2.0 build 1060)
- Download direct from SnapFiles.com
- Download from FreewareFiles.com
- Download direct from toolshape.com (thanks to Jocker for the bandwidth)
For Linux (version 1.5 build 1060)
Notes for Wink on Linux:
Wink requires GTK 2.4 or higher. The installer does not create any links/shortcuts. If you want shortcuts you will have to create them yourself. For a list of known issues in the linux version, view the readme.txt file in the wink directory after installation.
If the NumLock key is switched on, hotkeys in Wink do not work under Linux. So make sure to turn off the NumLock key while capturing.
As the first step after installation, please read the Wink UserGuide (present in the wink docs directory, also a link available in the windows start menu program group of Wink). Also, there are two tutorial projects created in Wink which you can view. Use the Help > View tutorial menu options to render and view them before you start using Wink. This will help you understand the basics easily.
Please post your queries/comments/reports at the Wink UserForum. The Wink UserForum is over here, please make use of it for posting your words about Wink so that fellow testers/users can benefit from what you have seen.
Licensed under the Creative Commons Attribution License 4.0
